
It's no secret that we're huge fans of the Raspberry Pi, the super-cheap computer that's capable of a wide range of impressive feats. If you have a DIY spirit, there's a lot you can do to turn this little $35 device into a streaming box and media center.
In the past, we've showed you how to install Kodi using XBian. But XBian is just one of several lightweight operating systems that run on Raspberry Pi and use Kodi as their front end. Today, we're going to show you how to use OSMC instead.
As we explained in that prior piece, Kodi won't run on your Pi directly – like any other app, it needs an operating system to run on. And that's led fans of media center apps like Kodi to develop their own operating systems. These stripped-down operating systems boot directly to Kodi, so a casual user may not even think about the operating system that's making their media center possible. But it is there, and there are small differences between the three major OS options (XBian, OpenELEC, and OSMC).
Why OSMC?
Every one of the popular operating systems for Kodi on Raspberry Pi has its own set of drawbacks and benefits. OSMC has a few key features that may draw you to it over XBian or OpenELEC.
One of the first things you'll notice about OSMC is that, out of the box, it looks different. It uses its own Kodi skin, a lightweight one that helps keep things fast. The OSMC Kodi skin is kind of similar to Mimic, which is one of Kodi's best skins, so this may draw you to OSMC.
Another key feature for OSMC is that advanced settings are easier to tweak than they are with some competitors (most notably OpenELEC). If you want to do advanced stuff like overclock, OSMC might be for you.
How to Install OSMC on Raspberry Pi
Are you on board? Great! Let us walk you through the process, which is pretty simple (and very, very similar to the process for installing XBian).
What You'll Need
Raspberry Pi
– We're using the B+, which is just $39. OSMC has a complete list of compatible Pis on their website.
Power source – The power source needs to be micro USB, and 5V and 1 amp should work well.
HDMI cable – To connect to the TV.
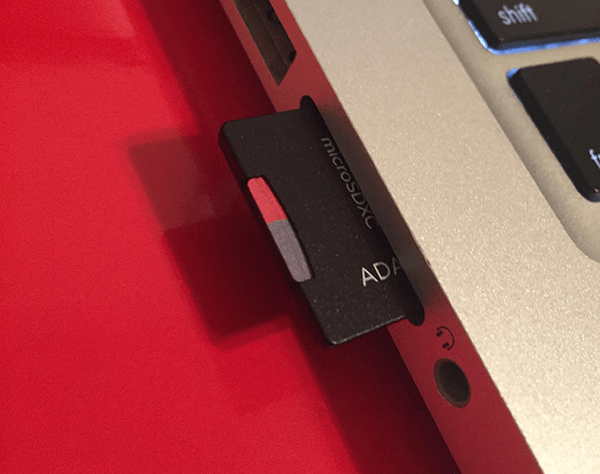
Micro SD card (or SD card, depending on which Raspberry Pi model you use) – You'll want at least 2 GB.
Computer with an SD card reader – We'll use this to download OSMC and put it on the SD card.
(optional) USB storage device – If you have a big video library, grab an external hard drive to put it on.
(optional) Ethernet cable or wireless dongle – Without the Internet, Kodi's streaming add-ons won't be worth much.
(optional) A case – Protect your Pi!
Step 1: Put Your SD Card Into Your Computer's SD Card Reader
Complicated, right? Try to stay with us here!
Step 2: Download the OSMC Installer
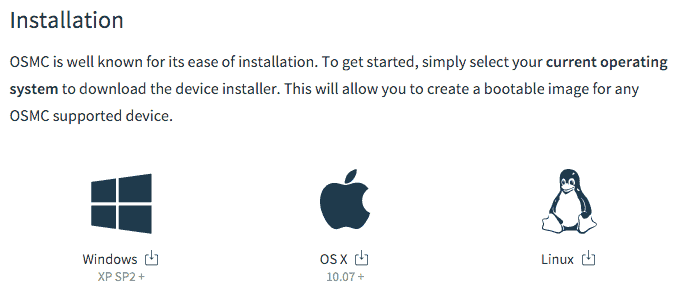
We're installing OSMC on the micro SD card, not on our computer. So in this stage, we're installing a program for our computer that will then install OSMC on the SD card. You can find the right version for your computer's operating system on OSMC's website.
Step 3: Install and Run the OSMC Installer

Mac users, remember that you have to control-click to open the program, since your computer will otherwise try to stop you from opening a program downloaded from the big scary Internet.
Step 4: Install OSMC on the Micro SD Card
The setup is so intuitive that you probably won't need our help, but here's a quick walkthrough:
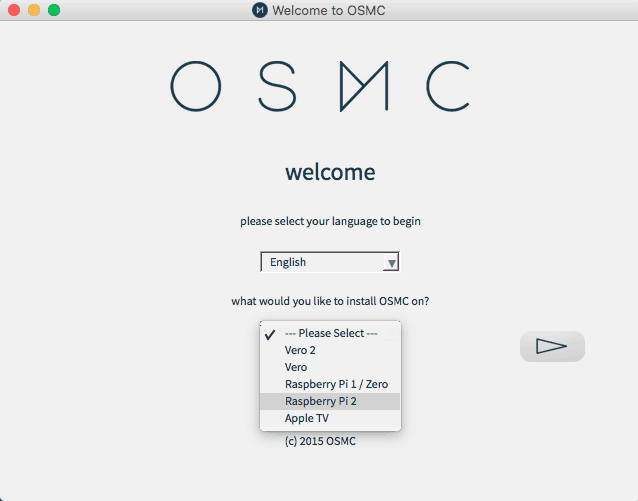
To install OSMC, just open up the OSMC installer and select your language and the type of device you're setting up. Our Raspberry Pi B+ is a Rapberry Pi 1, so that's the option we're going with.
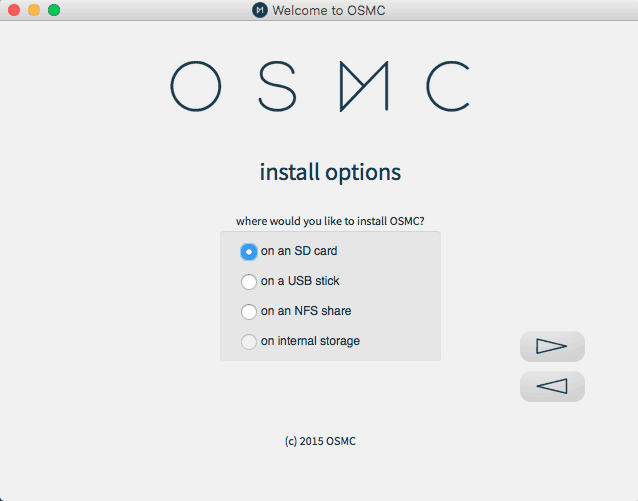
On the next screen, select the most recent version. Then, on the last screen, select the SD card option (you can also boot from USB, but we like this way since it leaves more USB ports open for peripherals and hard drives).
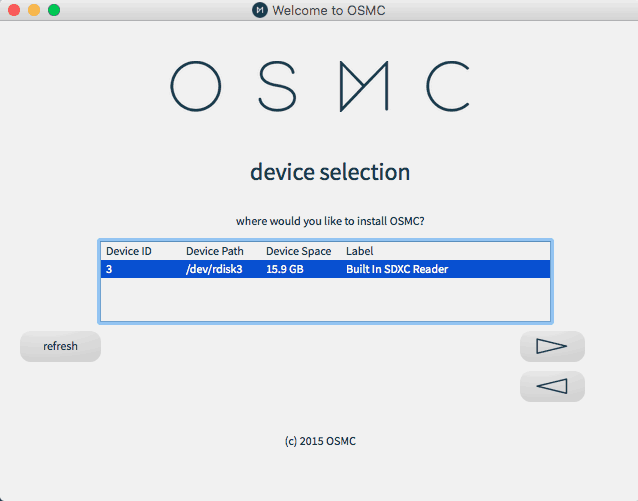
You'll have to select how your device will connect to the Internet (that's up to you – are you using an ethernet cable or a Wi-Fi dongle?) before proceeding to the next setup screen. Just select your computer's SD card slot, agree to the terms on the next page, and that's it! The installer will download the latest version of OSMC and will install it on your SD card. This process will take a few minutes.
Step 5: Put Everything Together
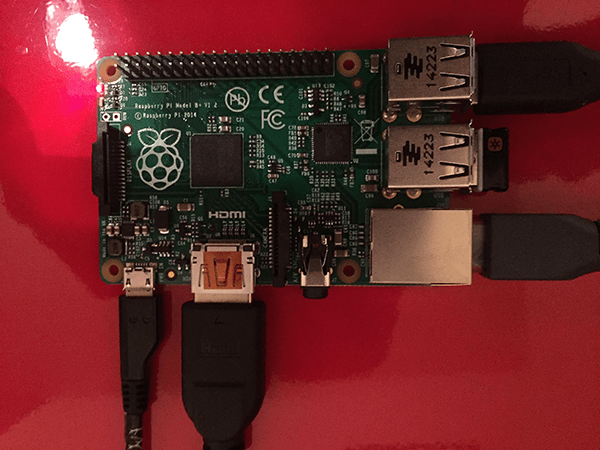
Eject the SD card and plug it into your Pi. Then make sure all your cables are connected properly – your HDMI cable, your ethernet (or Wi-Fi dongle, and whatever you're using to control your Pi. Plug the power cord in last.
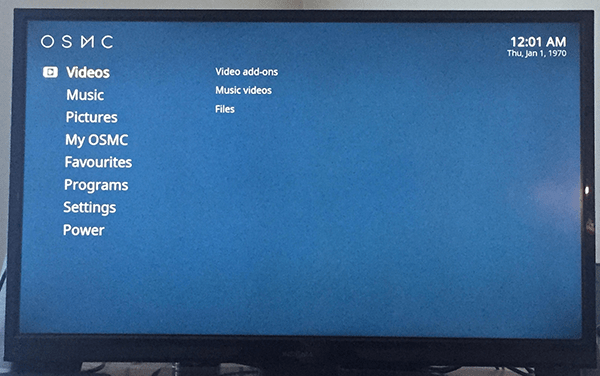
Step 6: Let OSMC Boot Up!
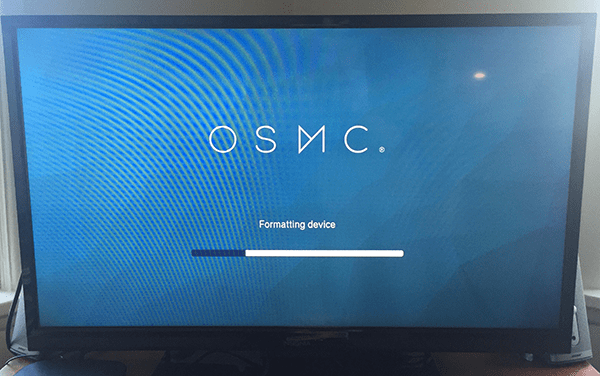
This is easy – OSMC will set up automatically. Just wait for the formatting and setup, and then enjoy!
Maybe they changed things since this was posted, but I can’t get OSMC at all for my Pi 2. No installer, just a bunch of codes I can’t get to work.
It’s all still there, just as described above.
My Pi is booting up after installing SMC image.
How do I install FUSION on OSMC Raspberry Pi 2?
How do I get Kodi on OSMC? I just installed OSMC to my Raspberry Pi 3. When I load it up it’s pretty much blank.
Here is a Sammy Simpleton question that you might enjoy. I am new to the Pi device as well as the OSMC software. My question is, after I have inserted the SD card with NOOBS into the Pi, do I then power down, re-insert that SD card into my PC, and perform the OSMC install onto the SD, then re-insert the card into my Pi? Do I win anything for having a question I’m sure anyone else would know the answer to?
Working on an instructable for making a Raspberry Pi Media Panel. I have downloaded the OSMC software to an SD card and inserted the card into the Pi. I connected the Pi to a TV via the HDMI cable. One difference between your instructions and the instructable was the way the Pi was powered; I am using a USB hub and “back-powering” the Pi. I am also using an Edimax wireless dongle which is supposed to be plug and play. My problem is that the TV is not receiving a signal. Not sure why. Any suggestions?
I get the same error: “install failed: can’t mount root.” What am I doing wrong?
Hi, I have got a raspberry pi 3 with OSMC Kodi 19.4.
I want to go back to Kodi 17.1. Choose the image 2020.11-1 and created a SD-card with the DD command in macOS.
When I stick the ad-card into my raspberry and reboot it is always
booting Kodi 19.4. How can I erase this release so that it will install the image from 2020.11-1. Also tried balenaetcher.